The Complete Guide to Video Production: From Concept to Distribution
- Mario Mattei

- Oct 9, 2025
- 13 min read
Updated: Jan 19

According to Cisco's Visual Networking Index, video will account for 82% of all internet traffic in 2025.
But here's what most businesses and creators don't realize:
Research from Wyzowl's State of Video Marketing shows that 86% of businesses use video as a marketing tool, yet only 23% have a documented video production strategy.
The difference between videos that achieve business objectives and those that waste time and money? A systematic video production process that balances creativity with strategic execution.
In this comprehensive guide, I'll walk you through the complete video production process—from initial concept through final distribution—so you can create videos that deliver measurable results.
Let's dive in.
Understanding the Video Production Process
Video production is a complex, multi-phase process.
Most people think video production is just showing up with a camera and filming. The reality is that professional video production involves strategic planning, creative development, technical execution, and careful post-production. Each phase is critical to the final result.
The three main phases are pre-production (planning and preparation), production (filming and recording), and post-production (editing and finishing). According to ProductionHUB's Industry Analysis, successful projects typically allocate 30% of time to pre-production, 20% to production, and 50% to post-production.
But here's what's interesting:
The most successful video projects actually start before pre-production with strategic planning. Research from Content Marketing Institute's Video Strategy Report shows that videos created with clear strategic objectives are 4x more likely to achieve their goals than those created without strategy.
What this means for your projects:
Don't skip the strategic planning phase. Invest adequate time in pre-production. Understand that production is just one part of the process. And recognize that post-production often takes longer than expected.
Phase 0: Strategic Planning and Objective Setting
Before any creative work begins, establish strategic foundation.
Define Clear Objectives and Goals
Start by identifying what you want to achieve.
Determine your primary objective. Are you building brand awareness, generating leads, driving sales, educating customers, or training employees? Each objective requires different creative approaches and success metrics.
Set specific, measurable goals. Instead of "increase awareness," aim for "reach 100,000 target audience members with 50% view-through rate." Specific goals enable proper planning and measurement.
Align video objectives with broader business goals. Ensure your video supports overall marketing, sales, or communication strategies. According to HubSpot's Video Marketing Report, videos aligned with business objectives deliver 3x better ROI.
Identify and Understand Your Target Audience
Deep audience understanding drives creative effectiveness.
Define your target audience precisely. Go beyond basic demographics to understand psychographics, behaviors, pain points, and motivations. Create detailed audience personas documenting who you're trying to reach.
Understand audience content preferences. Research what types of videos your audience watches, which platforms they use, and how they consume content. According to Think with Google's Video Viewing Research, 68% of YouTube users watch videos to help make purchase decisions.
Map the customer journey. Identify where video fits in the awareness, consideration, or decision stages. Different journey stages require different video types and messaging approaches.
Establish Budget and Resources
Realistic budgeting prevents problems later.
Determine your total available budget. Include all costs: pre-production, production, post-production, distribution, and promotion. Don't forget hidden costs like location fees, talent, music licensing, and revisions.
Allocate budget across production phases. Typical allocation is 20% pre-production, 30% production, 40% post-production, and 10% distribution. Adjust based on your specific project needs.
Identify available resources. Assess in-house capabilities versus outsourced needs. Determine equipment, locations, and talent availability. According to Vidyard's Video Production Cost Report, professional video production costs range from $1,000 to $50,000+ depending on complexity and quality requirements.
Define Success Metrics and KPIs
Measurement enables optimization and demonstrates value.
Establish specific KPIs aligned with objectives. For awareness, track reach, impressions, and view-through rates. For engagement, measure watch time, completion rate, and social shares. For conversion, monitor click-through rates, leads generated, and sales attributed.
Set up tracking and measurement systems. Implement proper analytics on all platforms. Use UTM parameters for traffic tracking. Set up conversion tracking and attribution. Create dashboards for ongoing monitoring.
Define benchmarks and targets. Research industry standards for your video type and platform. Set realistic targets based on benchmarks and past performance. Plan for continuous improvement over time.
Phase 1: Pre-Production Planning
Pre-production is where successful videos are built.
Creative Development and Concept Creation
Transform strategy into creative concepts.
Brainstorm creative approaches aligned with objectives. Generate multiple concepts and ideas. Evaluate each against strategic criteria. Select the strongest concept for development.
Develop your core message and story. Identify the single most important thing to communicate. Create a compelling narrative that engages emotionally while delivering your message. According to Stanford Graduate School of Business Research, stories are 22x more memorable than facts alone.
Define your creative style and tone. Determine whether your video should be professional, casual, humorous, inspirational, or educational. Ensure style aligns with brand identity and audience preferences.
Create mood boards and visual references. Collect examples of style, tone, and aesthetic you want to achieve. Share references with your team to align creative vision.
Scriptwriting and Storyboarding
Scripts and storyboards are your production blueprints.
Write a compelling script. Start with a strong hook in the first 3-5 seconds. Structure your narrative with clear beginning, middle, and end. Write conversationally for natural delivery. Include specific calls-to-action.
Keep scripts concise and focused. According to Wistia's Video Length Analysis, engagement drops significantly after 2 minutes. Aim for 150 words per minute of video. Cut ruthlessly to maintain pace and interest.
Create detailed storyboards. Visualize each scene and shot. Include camera angles, movements, and compositions. Note any graphics, text, or effects needed. Storyboards prevent surprises during production.
Write shot lists and shooting scripts. Break down every shot needed. Organize by location and setup for efficient filming. Include technical details like camera settings and lighting notes.
Location Scouting and Securing
Locations significantly impact production value and logistics.
Identify potential filming locations. Consider locations that support your story and message. Evaluate visual appeal and production suitability. Assess practical factors like accessibility, power, and noise.
Scout locations in person. Visit at the same time of day you'll be filming. Check lighting conditions and potential issues. Take photos and measurements. Test audio for background noise.
Secure locations and permits. Obtain written permission for all locations. Apply for necessary filming permits. Arrange insurance if required. Confirm access, parking, and facilities. According to Film Permits Guide, permit costs range from free to $1,000+ depending on location and jurisdiction.
Plan backup locations. Weather, access issues, or other problems can force location changes. Have backup options ready to prevent production delays.
Casting and Talent Coordination
The right talent brings your script to life.
Determine talent needs. Decide whether you need professional actors, company employees, customers, or voice-over artists. Consider diversity and representation in casting.
Find and audition talent. Use casting agencies, talent databases, or internal resources. Conduct auditions to assess performance and camera presence. Review demo reels and past work.
Negotiate and contract talent. Agree on rates, usage rights, and terms. Create written contracts specifying deliverables and expectations. Ensure talent signs appearance releases. According to SAG-AFTRA Rate Guide, professional talent costs range from $500 to $5,000+ per day depending on experience and usage.
Prepare talent for production. Share scripts and creative direction in advance. Conduct rehearsals if needed. Provide wardrobe guidance. Make talent comfortable and confident.
Production Planning and Logistics
Detailed planning prevents production problems.
Create comprehensive production schedules. Plan every shot, scene, and setup. Allocate realistic time for each element. Build in buffer for unexpected delays. Share schedules with all team members.
Assemble your production crew. Hire or assign director, cinematographer, audio engineer, lighting technician, and production assistants. Ensure everyone understands their roles and responsibilities.
Plan equipment and technical needs. List all cameras, lenses, lighting, audio, and grip equipment needed. Arrange rentals or confirm availability. Test all equipment before production day.
Coordinate all logistics. Arrange transportation for crew and equipment. Plan catering and meals. Confirm location access and parking. Prepare backup plans for weather or technical issues.
Phase 2: Production and Filming
Production day brings your vision to life.
Setting Up for Success
Proper setup ensures smooth filming.
Arrive early and set up thoroughly. Allow time for equipment setup, lighting, and audio checks. Test everything before talent arrives. Troubleshoot any issues with time to spare.
Establish your shooting environment. Control lighting for consistent, flattering results. Minimize background noise and distractions. Arrange set dressing and props. Create professional, on-brand environments.
Conduct technical checks. Test camera settings and exposure. Check audio levels and quality. Verify focus and framing. Record test footage and review carefully.
Brief talent and crew. Review the day's schedule and priorities. Communicate creative vision and expectations. Ensure everyone understands their roles. Create positive, collaborative atmosphere.
Directing and Capturing Footage
Direction and execution determine final quality.
Direct talent effectively. Provide clear, specific direction. Make talent comfortable and confident. Capture multiple takes for options. Give positive feedback and encouragement.
Execute your shot list systematically. Work through shots efficiently. Capture all planned footage plus additional coverage. Shoot from multiple angles when possible. Get more footage than you think you need.
Monitor quality continuously. Review footage regularly during filming. Check focus, exposure, and composition. Listen to audio quality. Identify and fix issues immediately.
Maintain production momentum. Stay on schedule without rushing. Take breaks to maintain energy and focus. Adapt to challenges and opportunities. Keep the team motivated and productive.
Capturing High-Quality Audio
Audio quality is as important as video quality.
Use appropriate microphones for each situation. Lavalier mics for interviews and dialogue. Shotgun mics for general coverage. Boom mics for controlled environments. According to Rode Microphones' Audio Quality Study, poor audio quality causes 62% of viewers to stop watching videos.
Monitor audio levels constantly. Use headphones to hear exactly what's being recorded. Watch levels to prevent clipping or distortion. Record room tone for post-production flexibility.
Control environmental audio. Minimize background noise and distractions. Turn off HVAC systems during recording. Avoid locations with traffic or other noise. Use sound blankets or acoustic treatment when needed.
Record backup audio. Use multiple microphones when possible. Record separate audio tracks for flexibility. Capture safety recordings at different levels.
Managing Production Workflow
Organization prevents chaos and ensures nothing is missed.
Stay organized throughout production. Keep detailed notes on each take. Log which takes are best. Document any issues or concerns. Maintain shot lists and check off completed items.
Back up footage immediately. Copy files to multiple drives or cloud storage. Verify file integrity. Never rely on single copies of irreplaceable footage.
Communicate with your team. Hold brief check-ins throughout the day. Address issues quickly. Celebrate successes. Maintain positive energy and collaboration.
Wrap production properly. Capture any additional shots needed. Thank talent and crew. Secure all equipment. Leave locations clean and undamaged. Confirm you have everything needed before leaving.
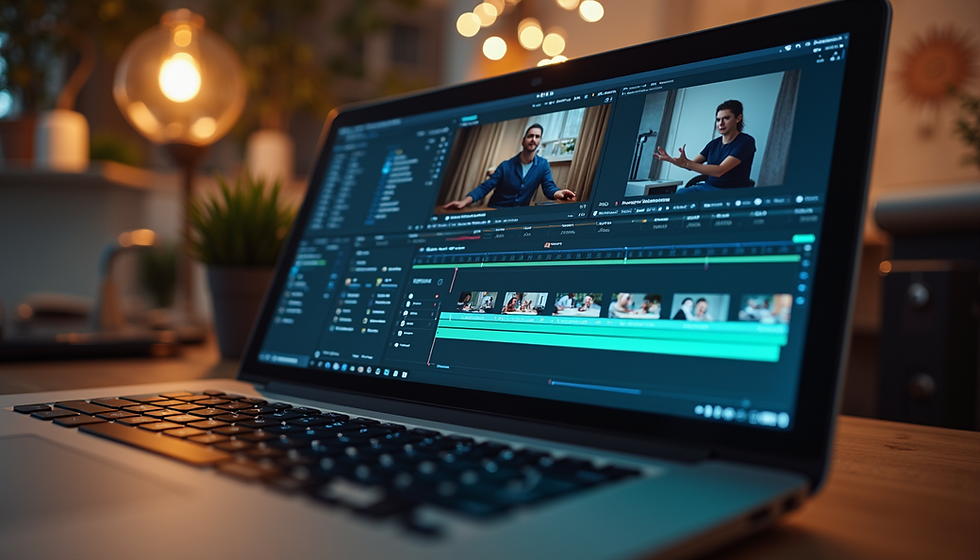
Phase 3: Post-Production and Editing
Post-production transforms raw footage into polished final product.
Organizing and Reviewing Footage
Organization saves time and prevents frustration.
Import and organize all footage. Create logical folder structures. Use consistent naming conventions. Organize by scene, shot, or date. Import all footage to editing system.
Review all footage carefully. Watch everything you captured. Note best takes and moments. Identify any issues or problems. Create selects of footage you'll likely use.
Transcribe interviews and dialogue. Create written transcripts of all spoken content. This speeds editing and ensures accuracy. Many editing programs offer automated transcription.
Back up project files. Maintain multiple backups of all footage and project files. Use redundant storage systems. Protect against data loss throughout post-production.
Editing and Assembly
Editing creates the story and pacing.
Create a rough cut. Assemble footage following your script and storyboard. Focus on story structure and pacing. Don't worry about polish yet. Get the basic narrative working.
Refine pacing and timing. Tighten edits to maintain engagement. Cut anything that doesn't serve your objective. According to Wistia's Engagement Research, videos lose 20% of viewers in the first 10 seconds, so hook attention immediately.
Add b-roll and supporting footage. Layer in additional footage to enhance storytelling. Use b-roll to cover edits and add visual interest. Ensure smooth transitions between scenes.
Incorporate graphics and text. Add titles, lower thirds, and text overlays. Create animated graphics and motion elements. Ensure all text is readable and on-brand.
Color Grading and Correction
Color work enhances visual quality and mood.
Perform color correction first. Balance exposure and white balance. Ensure consistent look across all footage. Fix any technical color issues. Create neutral baseline for grading.
Apply creative color grading. Enhance mood and atmosphere with color. Create consistent visual style. Match brand colors and identity. According to Adobe's Color Psychology Study, color influences 85% of purchase decisions.
Ensure consistency across shots. Match color and exposure between different shots and scenes. Create seamless visual flow. Avoid jarring color shifts.
Optimize for delivery platforms. Ensure colors display correctly on different devices. Account for platform compression. Test on multiple screens.
Sound Design and Audio Mixing
Professional audio elevates production quality.
Clean up dialogue and voice-over. Remove background noise and distractions. Equalize for clarity and presence. Compress for consistent levels. Ensure dialogue is clear and intelligible.
Add music strategically. Select music that enhances mood and pacing. Ensure proper licensing for all music. Mix music to support without overwhelming. According to Epidemic Sound's Music Impact Study, appropriate music increases emotional engagement by 33%.
Incorporate sound effects. Add sound effects to enhance realism and impact. Use subtle effects to smooth transitions. Ensure effects feel natural and appropriate.
Mix all audio elements. Balance dialogue, music, and effects. Create professional, polished sound. Ensure consistent levels throughout. Master for optimal playback across devices.
Graphics, Animation, and Visual Effects
Motion graphics and effects add polish and clarity.
Create title sequences and graphics. Design opening titles and credits. Create lower thirds for speaker identification. Add text overlays for key information. Ensure all graphics are on-brand.
Develop animated elements. Create animated logos and transitions. Build motion graphics to explain concepts. Add visual interest with subtle animations.
Add visual effects as needed. Remove unwanted elements. Enhance or correct footage. Create effects that support storytelling. Keep effects subtle and professional unless style calls for bold approaches.
Ensure technical quality. Render graphics at appropriate resolution. Maintain consistent style across all elements. Test graphics on different screens and devices.
Review, Revision, and Approval
Refinement ensures quality and client satisfaction.
Conduct internal review. Watch complete video multiple times. Check for errors, inconsistencies, or issues. Get feedback from team members. Make necessary revisions.
Present to stakeholders for feedback. Share video in appropriate format and context. Provide guidance on type of feedback needed. Document all feedback and revision requests.
Implement revisions systematically. Prioritize feedback and revision requests. Make agreed-upon changes. Track revisions and versions carefully. According to Wipster's Revision Management Study, projects average 3-5 revision rounds.
Obtain final approval. Confirm all stakeholders approve final version. Get written sign-off when appropriate. Prepare for final delivery and distribution.
Final Delivery and Export
Proper export ensures quality across all platforms.
Export in appropriate formats and resolutions. Create versions for each distribution platform. Optimize file sizes without sacrificing quality. Follow platform technical specifications.
Create multiple versions as needed. Export different lengths for various uses. Create versions with and without captions. Prepare platform-specific aspect ratios.
Deliver files to clients or platforms. Upload to hosting platforms. Provide files in agreed-upon formats. Include all necessary metadata and information.
Archive project files. Save all project files, footage, and assets. Maintain organized archives for future use. Document project details and decisions.
Phase 4: Distribution and Promotion
Creating great video is only half the battle—distribution drives results.
Platform Selection and Optimization
Choose platforms strategically based on objectives and audience.
Identify optimal distribution platforms. Consider where your target audience consumes content. Evaluate platform capabilities and requirements. Prioritize platforms aligned with objectives.
Optimize for each platform. Follow platform-specific best practices. Use appropriate aspect ratios and lengths. Add platform-specific features like cards, end screens, or interactive elements.
Create platform-specific versions. Adapt content for different platforms rather than using identical versions everywhere. According to Sprout Social's Platform Optimization Report, platform-optimized content performs 6x better than generic content.
SEO and Discoverability Optimization
Optimization helps audiences find your content.
Optimize titles and descriptions. Use relevant keywords naturally. Write compelling, click-worthy titles. Create detailed descriptions with timestamps. Include relevant links and calls-to-action.
Add comprehensive tags and metadata. Use relevant tags and categories. Add closed captions and transcripts. Include all appropriate metadata. This improves searchability and accessibility.
Create compelling thumbnails. Design eye-catching custom thumbnails. Ensure thumbnails accurately represent content. Test different thumbnail approaches. According to YouTube's Creator Academy, 90% of best-performing videos have custom thumbnails.
Implement video schema markup. Add structured data to web pages with video. Help search engines understand and index video content. Improve visibility in search results.
Promotion and Amplification Strategy
Great content needs promotion to reach audiences.
Develop comprehensive promotion plans. Identify all promotion channels and tactics. Create promotion timeline and schedule. Allocate budget for paid promotion if appropriate.
Leverage owned media channels. Share on company website and blog. Promote through email marketing. Feature on social media channels. Integrate into other marketing materials.
Utilize paid promotion strategically. Use platform advertising to reach target audiences. Retarget engaged viewers. Test different targeting and creative approaches. Monitor and optimize based on performance.
Engage influencers and partners. Identify relevant influencers and partners. Provide them with content to share. Encourage employee advocacy and sharing. Leverage existing relationships and networks.
Measurement and Analytics
Track performance to understand impact and optimize future efforts.
Monitor key performance metrics. Track views, watch time, and engagement. Measure click-through rates and conversions. Analyze audience retention and drop-off points. Compare performance against goals and benchmarks.
Analyze audience behavior and preferences. Understand who's watching and how they found your content. Identify which content resonates most. Learn from both successes and failures.
Calculate ROI and business impact. Connect video performance to business outcomes. Measure leads generated, sales influenced, or costs reduced. Demonstrate value to stakeholders.
Apply learnings to future projects. Document what worked and what didn't. Identify opportunities for improvement. Continuously refine your video production and distribution strategy.
Common Video Production Mistakes to Avoid
Mistake #1: Skipping Pre-Production Planning
The problem is rushing into production without adequate planning.
The solution is investing time in thorough pre-production. Plan every aspect before filming begins. Create detailed scripts, storyboards, and shot lists. Proper planning prevents costly production problems.
Mistake #2: Poor Audio Quality
The problem is focusing on video while neglecting audio quality.
The solution is prioritizing audio as much as video. Use appropriate microphones and monitoring. Control environmental noise. According to Rode's Audio Quality Research, viewers will tolerate imperfect video but not poor audio.
Mistake #3: Weak or Missing Call-to-Action
The problem is creating videos without clear next steps for viewers.
The solution is including strong, specific calls-to-action. Tell viewers exactly what to do next. Make actions easy and obvious. Test different CTAs to optimize conversion.
Mistake #4: Ignoring Platform Requirements
The problem is creating one-size-fits-all content for all platforms.
The solution is optimizing content for each platform. Follow platform-specific best practices. Create platform-appropriate versions. Adapt content to platform audiences and algorithms.
Mistake #5: No Distribution Strategy
The problem is creating great content that nobody sees.
The solution is developing comprehensive distribution and promotion strategies. Plan distribution before production begins. Allocate budget for promotion. Actively promote content across multiple channels.
Mistake #6: Failing to Measure Performance
The problem is not tracking video performance or learning from results.
The solution is implementing comprehensive analytics and measurement. Track relevant KPIs aligned with objectives. Analyze performance regularly. Apply learnings to improve future videos.
The Bottom Line
Video production is a complex process requiring strategic planning, creative execution, and technical expertise.
Success comes from following a systematic process that balances creativity with strategic objectives. From initial concept through final distribution, each phase is critical to achieving your goals.
The framework in this guide provides a proven roadmap for creating videos that deliver results. Whether you're creating your first video or your hundredth, following this process will improve quality, efficiency, and effectiveness.
Remember that great video production isn't about having the most expensive equipment or the biggest budget. It's about understanding your objectives, knowing your audience, planning thoroughly, executing professionally, and distributing strategically.
Master this process, and you'll create videos that don't just look good—they achieve measurable business results.
Ready to start your next video production project?